
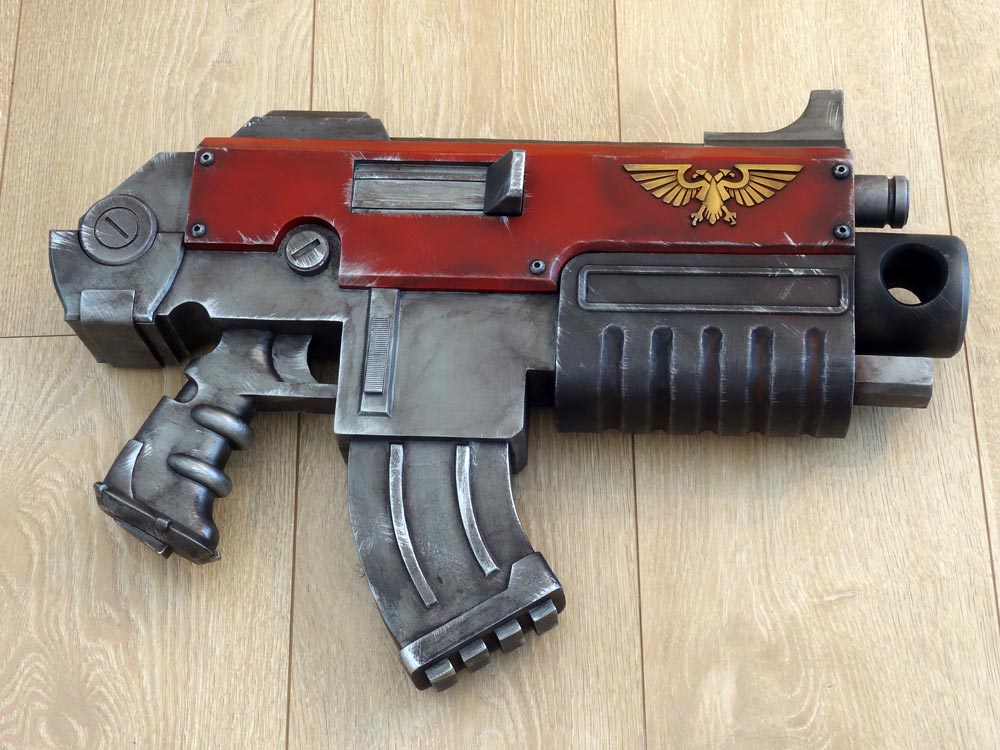
Warhammer Bolter Project Introduction
Here is the chronicle of the 0.75 caliber Astartes Mark Vb Godwyn Pattern Bolter construction. This cosplay prop was built as a free gift in a “Secret Santa” prop exchange event run on The PropTarts of Punished Props Facebook group, a cosplayer and prop maker group. I’ve run the last couple of events and it was a lot of fun.
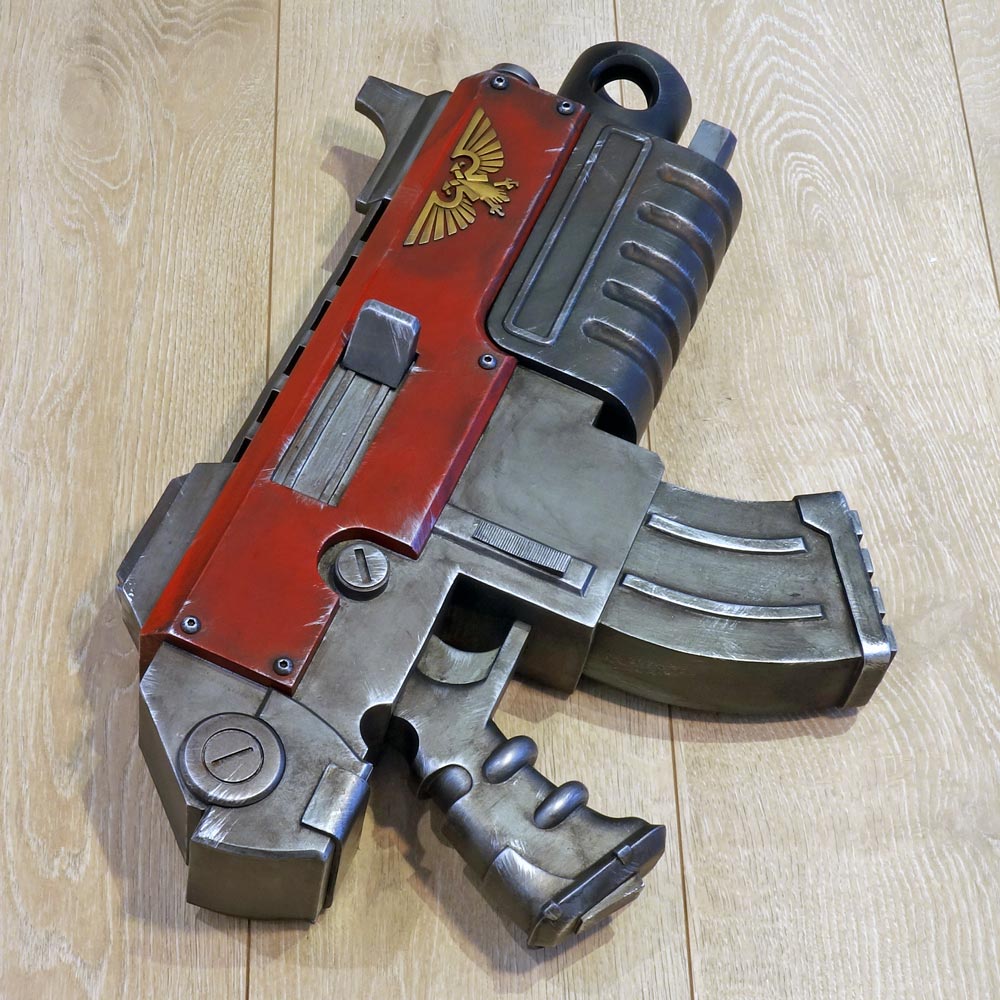
Built primarily out of a mix of standard HD EVA foam and extra high density HardLite EVA foam with 3D printed and resin cast components, with the foam being sealed with Rossco FlexBond and the whole Bolter painted with acrylic paints.
The magazine is friction fit and should hold small items such as cash/keys/card, or snacks, or other small personal effects of choice.


Designing and Templating Astartes Mark Vb Godwyn Pattern Bolter
I actually used the nice 3D model produced by Jaiman Bhardwaj (no link, probably fell afoul of recent Games Workshop mass defendant court case) and turned the design into a template I printed on cardstock, since this was going to be largely a foam construction.
My 3D design skills are limited so I put the Bolter into Tinkercad to cut out the pieces I wanted to 3D print. I decided that 3D printing the muzzle, laser sight and other round parts for example would give a better result than foam or PVC pipe. Some of these pieces were later resin cast for faster build times.


Since I was on a time limit and I wanted to reduce the amount of sanding, I removed the texture from the grip. I also did not reproduce the bolts that attach the front and rear sights to the bolter. I added some holes to mount the pieces with rod.
Since it is claimed a bolter is ambidextrous I put the port ejector and charging handle on both sides.
Warhammer Bolter Size
There’s always some debate on how big a weapon should be. Many people size it according to their hand. I decided NOT to make it full sized as I don’t know of a human big enough to effectively weild one.
A Warhammer forum called Obscurus Crusade (now defunct) discussed sizing and a popular method of sizing was for the weapon to have a 3″ barrel diameter, so that’s what I did. Based on this you should get a Bolter between 400mm and 700mm depending on what template you use. The one I made was 570mm.
Building the Astartes Mark Vb Godwyn Pattern Bolter
The main body is made out of 3 layers of stiff high density EVA foam. 50mm forms the core and the 2 thinner outer layers form the mag well. 2 smaller plates go on top to form the upper (red painted) “shroud”. Having a bandsaw made cutting to shape easier than a knife.
I used a rotary tool to round off the front end where the fore grip will go.
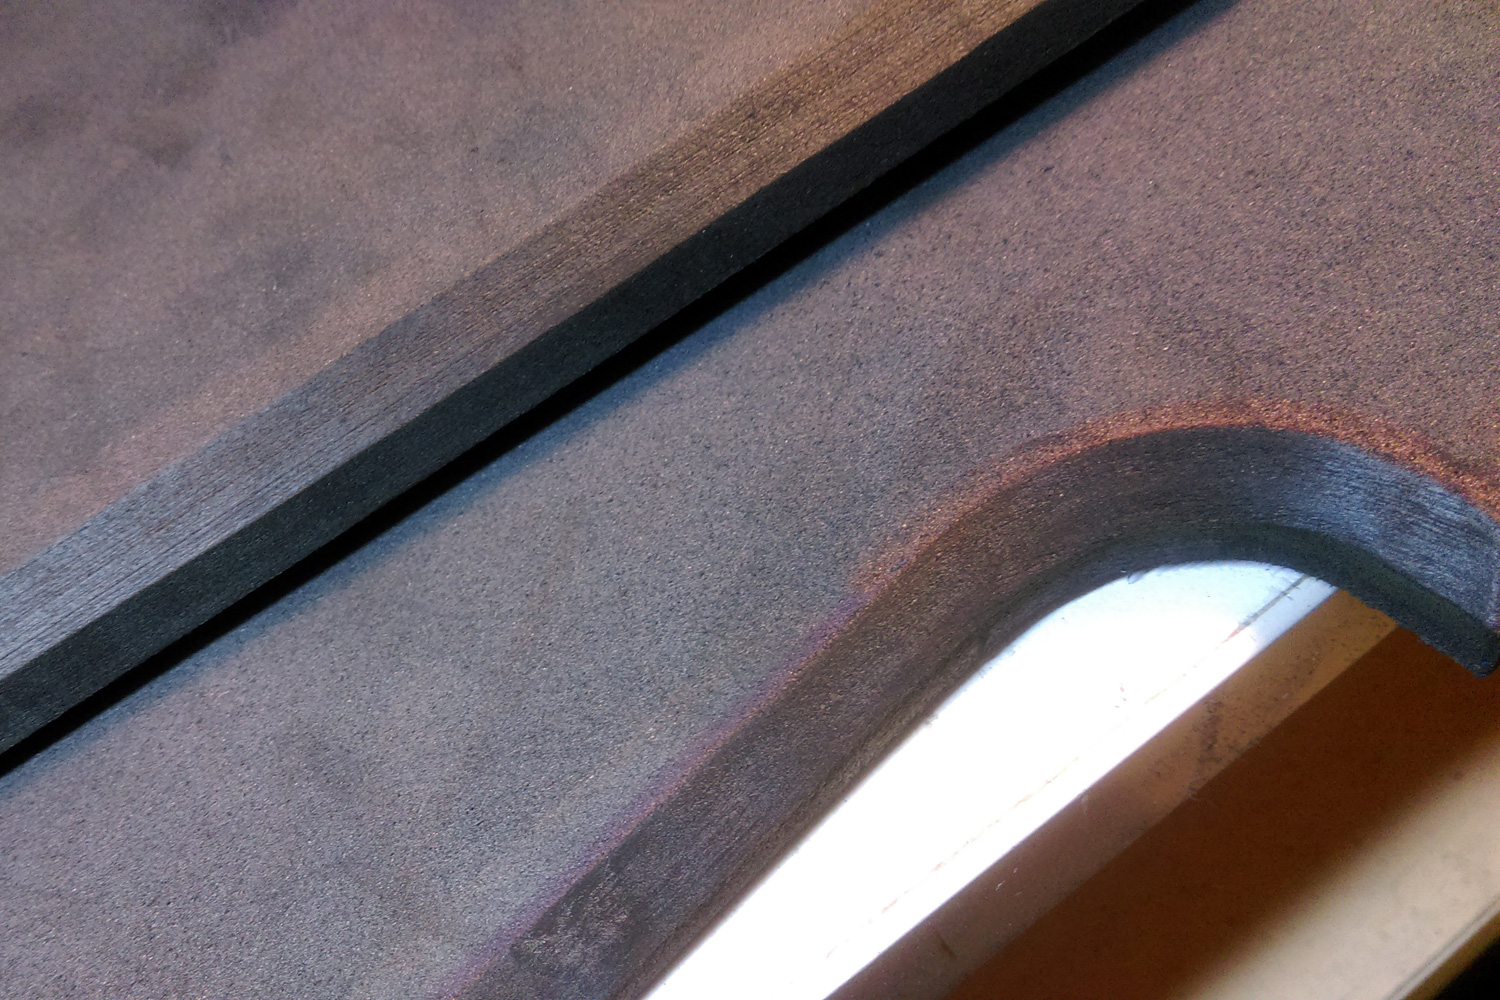
The bottom edge of the “side plate” has a bevel so I used a bevel attachment I 3D printed for my rotary tool to grind a nice even bevel.

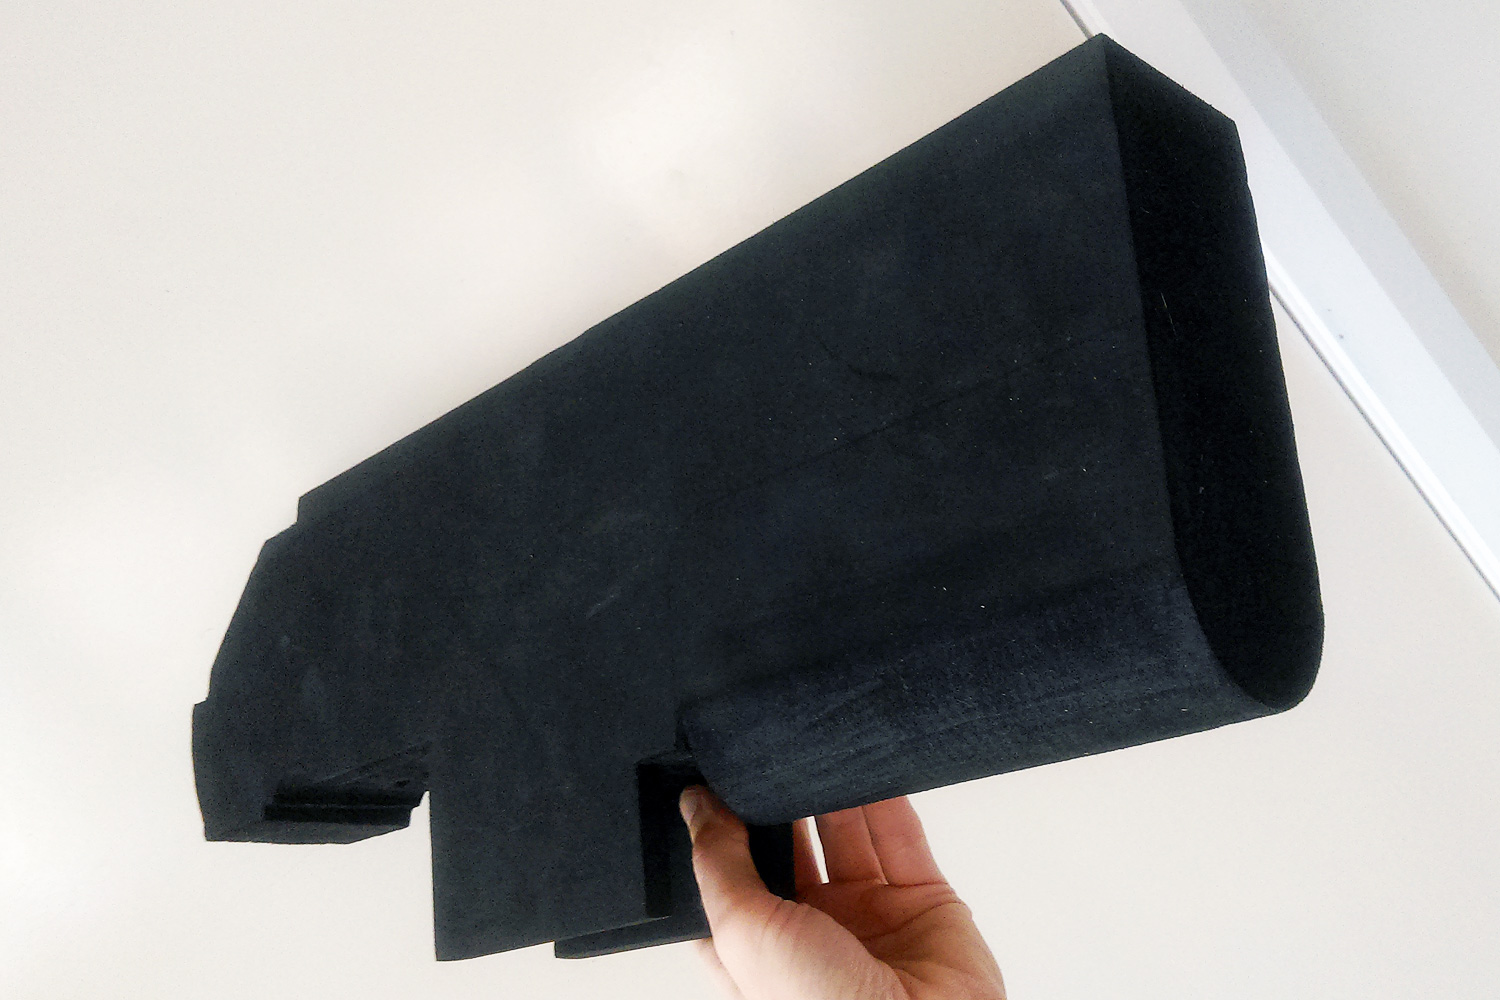


For the fore grip itself, I cut grooves out of some foam then used a rotary tool to grind out a rounded end. This was then glued onto the main Bolter body and contoured with foam clay. I also used the bandsaw to cut the bevel along the top of the Bolter.


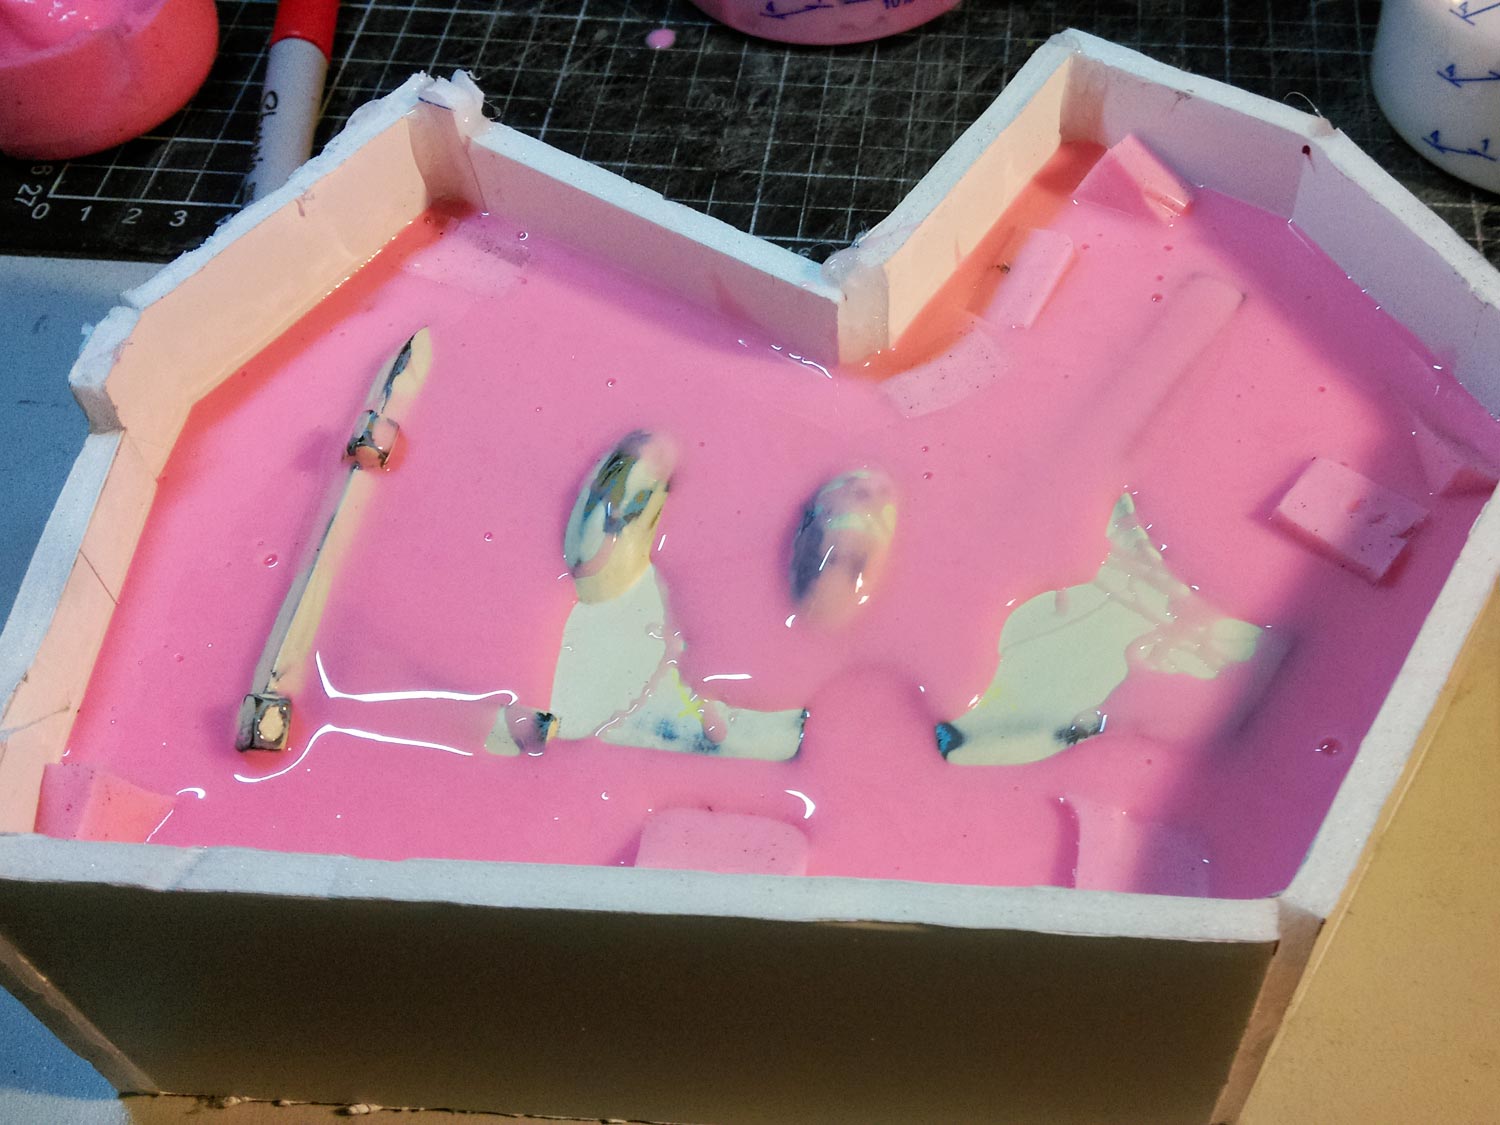
3D Printing, Mold Making and Resin Casting
3D printing can be time consuming, but the final results satisfying. I knew I couldn’t make an accurate muzzle out of foam and the hand grip is going to get a lot of wear. The Aquila, foregrip frame and some other pieces were also 3D printed.


Since it can take hours to print, sand and smooth a part, some 3D printed parts were molded in silicone and cast in polyurethane resin.


After sealing the foam with (slightly watered down) FlexBond and allowing drying time, the 3D parts were attached; The 3D printed parts were sanded, and I used automotive filler primer to fill in more print lines and cracks. I had designed some small holes in all parts and used aluminium rod for the larger parts (and a stub of an 18 year old pencil for the muzzle!) and small metal rods for the other parts. While the grip had some 5 minute epoxy, the other parts simple had superglue to bond them.
Construction complete! Next step, on to painting!
Painting The Astartes Mark Vb Godwyn Pattern Bolter
After a black undercoat where appropriate (to cover any grey foam I used or sharpie marks) I moved on to applying the colours. I used a gunmetal for the main body, a darker gun metal for the foregrip and Tamiya X-7 for the red portions. The Aquila emblem got a golden colour.
A Note About Rosco FlexBond
Rosco FlexBond handles just like PVA glue but it is super flexible. It can be wet sanded for a smooth glossy finish. It makes a good alternative to Plasti-Dip, especially if you are working in cold temperatures, a small space or inside your own home (Plast-Dip is toxic and needs ventilation and respirator). It does require sufficient paint coverage to remove the slight tackiness that FlexBond leaves.


And then on to weathering. This can add a depth and authenticity to the prop that can enhance it’s overall effect.
Warhammer Bolter Build Complete
And it’s done! This was a big effort and I hope the recipient loved their Christmas gift 🙂


Fake Wax Seal
I have made some “wax” seals – 3D printed and then resin cast. I included a couple as a gift.


Disclaimer
This web site is completely unofficial and in no way endorsed by Games Workshop Limited. Games Workshop, Space Marine, Space Marine chapters, Ultramarines, Warhammer and all associated marks, names, races, race insignia, characters, vehicles, locations, units, illustrations and images from the Warhammer 40,000 universe are either ®, TM and/or © Copyright Games Workshop Ltd 2000-2011, variably registered in the UK and other countries around the world. Used without permission. No challenge to their status intended. All Rights Reserved to their respective owners.
Related Images:
Discover more from Cybermike, Balding Eagle
Subscribe to get the latest posts sent to your email.