 Well me and my bright ideas. I know, lets make body armour with skills I haven’t yet properly developed and with a material I’ve no experience with at all.. yaaay.
So Jaune Arc took a while. This and my progress on my US Colonial Marine has taught me a lot about thermoplastics such as Worbla (Worbla’s Finest Art, Worbla Black, Worbla Pie) Cosplayflex, and Lumiflex.
This build log is a work in progress so check back for a better version and maybe even some templates.
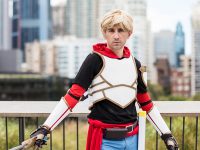
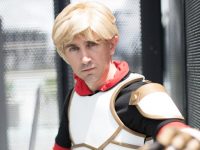
Finished Jaune Arc Cosplay
Excuse my derp face. I don’t know how to make my face work.
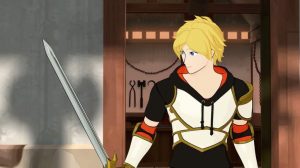
Designing Jaune Arc’s Armour – In Brief
I used a Duct Tape Dummy (what I call my Manequinn Me) to design and fit the body armour. For the bracers, elbow cups and gauntlets I used the cling wrap and masking tape method that is very popular. The shoulder was mostly designed free hand while looking at a crap load of reference photos. So the armour is custom fitted and not completely accurate, but “accurate enough” in my opinion, real-world concessions aside (more detail below).
Building Jaune Arc
Not knowing about the flexible nature of acrylic paint I decided Jaune would be made with thermoplastic like Worbla, so that the hard shell could be spray painted with a nice uniform enamel finish.
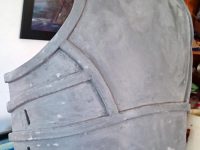
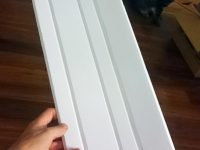
I used a three different thermoplastic sheets for this outfit: Cosplayflex for the body armour and elbow cups, Worbla Black for the arm bracers and gauntlets, Lumiflex for the shoulder armour.

My main problem with working with thermoplastics is the repeated heating required to find the perfect shape for the body armour. This causes bubbles in the thermoplastic, due in part to gas escaping from the heated foam and having nowhere to go. I call this “The Dreaded Toad Skin of Thermoplastic”, or “TSOD” for short, as that is what it looks like. What is the best way to deal with TSODs once you get them? This; When the thermoplastic is cold, stab the edge of the bubble with a pin to create a hole. Then heat the thermoplastic until pliable, and gently push flat the bubble, starting from the outside edges and working towards the hole. This minimises but does not removes the damage. To fix the damage you’ll need to use a filler, such as wood filler, gesso, or Bondo/automotive filler if you enjoy long hours of sanding a hard surface smooth. Perhaps a spot putty will be a great solution for this.
But the rest of the surface will still require more smoothing! How you do this is up to you. Some people try a few layers of PVA glue, some use Rosco Flex Bond. Myself, I found the magic of automotive filler primer or spray putty. It’s like primer but goes on thicker and is self levelling. While it clogs your sandpaper quickly, you can sand it to a silky smooth finish.
A few layers of a flat (matte) white spray paint and I was able to then mask off the details ready for their colour. I had some shiny gold in a can, too bright and glossy for my needs. It was my aim to clear coat the gold with a matt coating to reduce the shine and protect the surface from scratches.
So apparently when you put an acrylic clearcoat on top of a metallic enamel you get some kind of weird reaction/result. My shiny gold turned into a dirty and slightly splotchy bronze. Ironically this wasn’t a disaster, as I said the shiny gold was too gold and shiny for what I wanted. What would have been ideal is a finish somewhere between the shiny gold and dirty bronze. Oh well, with mere days until RTX Australia I couldn’t do anything about that except proceed.
The sword: After 3D printing, I had to do a lot of filling and sanding to get it smooth. I glued the blade to the hilt with 5 minute epoxy. I wrapped the handle in a blue faux leather tennis grip (also from aliexpress.com).
The day before the con I needed a sword scabbard. A shield was too time consuming at that stage. I got hold of some foam core and used a cool 45 degree angle cutter to score V grooves on the inside, which allowed me to bend the foamcore at 90 degrees. This was a tough and ready “it’ll do” scabbard that wasn’t fully faithful to the design. Future upgrade plans!
Body Armour
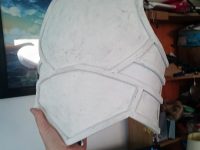
My Mannequin Me aka Duct Tape Dummy I made for my USCM came in handy. Using reference photos I determined Jaune must have an elongated body compared to mine, so my design ended up shorter than his, so I could still bend over etc. I also made sure there was enough room under my arms. These real-world concessions also included making the body armour in 2 pieces, as hey, I can’t make the armour from computer generated polygons where my armour bends and stretches when I do. I wanted the body armour to fit well rather than be loose, which is why I didn’t opt for a 1 piece design.
The back and chest plates are held together with white nylon webbing and white clips. The shoulder ones are usually hidden by the hood of the undershirt.
Arm bracers
I had to make another real-world concession here – how to get them on? My choice were to make an obvious 2 piece design (2 halves, hinges, clasps/buckles, etc). Instead I left the inseam oven with JUST enough flex for me to slip my arm into.
To come up with the design I used the cling wrap and masking tape method – I put on the red arm sleeve that would form part of the costume, covered in in cling wrap then masking tape, and drew on the design with a marker, using numerous reference images of Jaune. I cut this out, transferred it to cardstock (and neatened the design) and thus my arm bracer template was born. This is a very common armour/costume designing method.
Gauntlets
I used the same cling wrap and masking tape method to come up with the deisgn. Jaune’s armour pieces wraps completely around each finger segment but I wanted at least some chance of being able to hold things, and also time was short, so I changed my original design plan and just created curved “plates” to go on the top of each finger segment.
I temporarily glued scrap foam to the underside of each piece for painting. Stuck skewers in the foam and used a foam block to hold them upright while they were drying.
Elbow Cups
A spray can proved to be a good object to curve these around.
Shoulder Armour
I used Lumiflex for this piece. It is an Australian thermoplastic for more advanced users. This is for a few reasons;
- It’s EXTREMELY elastic and will stretch. This can be a blessing or a curse, depending
- Overheating/repeated heating will cause bubbles that actually thin and burst
- It’s STICKY. So sticky that if it accidentally folders over on itself it will not come apart.
- It’s floppy when heated. Combined with it being STICKY….
But it is also the SMOOTHEST thermoplastic I’ve used. Smoother than Worbla Black. You can make it smooth with your finger while it’s still warm. That it is so smooth and pliable means you can reshape it and smooth it out and it might be great for accents and detail work.
Jaune Arc’s Sword: Crocea Mors
I 3D printed this using a design I bought from Jonathan Bowen. Endless sanding, coating in gesso/filler, filler primer and painting.
Jaune Arc’s Clothing
Pretty much everything (shirt, pants, belt, gloves, boots, red sports sleeves) came from Aliexpress.com. A very important thing to note when buying things from Aliexpress: Their Asian sizing is 2 sizes smaller than westerners. So our size Small is their size Large. Measure yourself with a tape measure and order appropriately.

Items in more detail;
Shirt: I found a thin black hoody shirt with red lining and red draw strings. I cut the sleeves short, sewed a hem, and that bit was done! Aim for a thin material as opposed to a sweater/thick material because cons can be hot, especially when wearing armour that blocks airflow.
Red Arm Sleeve: I grabbed a pair of those UV protective sport arm sleeves you see cyclists and basketballers wear. Form fitting with some rubber at the top to stop it sliding down the arm.
Pants: Sure you could just use blue jeans but I felt that was too much texture so I found some nice cotton pants with a uniform colour. Comfy too.
Belt: Jaune has a big brown leather belt with a rectangular brass buckle. I got something similar (again from aliexpress.com).
Gloves: Jaune has brown leather gloves.
Boots: I did not make the white caps as I was pressed for time and felt it was a minor detail. I just reused my tactical boots from my Deadshot outfit.
Red sash: *sniff* Pyrrha… Just a red scarf.
At/After the Con
- Some of the pieces fell off the gauntlet so they need regluing
- The sword hilt rubbed marks onto the body armour
- The sword paint must not have fully cured as it got very scratched up
Future Upgrades
- Make a much better scabbard, OR his shield
- Repaint the armour, then seal all of it with a matt clear coat to prevent marking
- Sand back and repaint the sword
- Change the shape of the middle upper chest to be more prominent (perhaps Bondo/auto filler, and lots of sanding *cry*)
Did you find this build log useful? Lets have a cup of tea ^_^
